
Hello, dear visitor. I am glad my website has caught your attention, and I will be even happier if you find the information here useful.
Today I will describe how I corrected a few uncomfortable aspects of the office chair repair I did earlier. You can see the first part here: Office chair repair: reupholstering the seat
The discomfort I discovered after using it was that with the thinner layer of foam, the buttons pressed into me whenever I sat for any length of time.
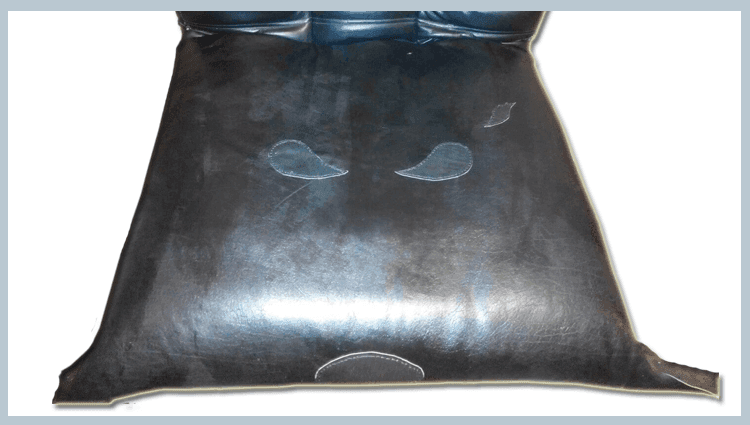
I decided to increase the seat thickness using the remaining foam and remove the buttons. After removing them, I found that they had stretched the leather, so I needed to find a way to hide these defects. I decided to cut several comma-shaped patches, glue them on symmetrically, and stitch them in place.
In the photo below, you can see the patches cut out using a single paper template:

In this photo, you can see the marks left by the buttons that need to be hidden under patches:

The photo below shows the patch being sewn onto the leather seat with a hook and black nylon thread:

We glue on the remaining foam to increase the seat thickness. The original seat had a hollow, which made it more comfortable for relaxing and watching films, but I prefer a flat seat for working. I glued the remaining pieces onto the seat with the Dragon glue I had available:

Here you can see the drops of glue:

We press the glued foam down with an armrest or any other object at hand. The foam does not need to be glued particularly firmly: the glue only needs to keep it in shape until the office chair seat is upholstered. After that, the upholstery will hold it in place:

After several hours under a weight, the foam is glued in place:

We start stretching the leather upholstery over the chair seat. This takes quite a lot of effort to round off the seat edges and prevent sagging over time. I did not cut or sew the corners; it was easier for me to fold them neatly and staple them underneath. However, cutting the corners and stitching them from the inside would have looked better:

In the photo below, the repaired office chair is fully assembled. Please excuse the photo quality. I should also say that the chair looks better in real life than it does in the photo:

Today I have shown how I corrected a few shortcomings in my office chair repair, replacing the seat upholstery. I will be glad if this information has been useful to you as well.
This was Sergey Lazarenko.
If you would like to learn to sew with a shoemaker's hook and repair your own shoes, or replace an office chair's upholstery as in this article, watch this video on sewing with a hook:

Add comment